XY Calibration
- Click Capture in the Setup and Capture window to begin the image capture process:
(Hover over the image to view larger)
- If you are using an internal camera, images will be captured automatically.
If you are using an external camera, you will be prompted by NanoScope to manually capture an optical image each time the stage is moved.
- Capture the 1st optical imageand click OK in the NanoScope popup dialogue.
- The stage will now move to the 2nd spot according to the value previously defined. You will be prompted to capture the 2nd optical image.
- The stage will now move to the 3rd spot according to the value previously defined. You will be prompted to capture the 3rd optical image.
- For both internal and external cameras, if the stage movement was not optimized (e.g. the feature moves outside the field of view or does not move enough) or if the images are out of focus, you can make adjustments and click Re-Capture Reg. Images to acquire images again. If you are using an internal camera, the images will be overwritten.
- Click Next.
- If you are using an internal camera, images will be automatically imported into the wizard.
If you are using an external camera, locate and Open ALL captured optical images (i.e, you will open 3 images in the case of linear interpolation):
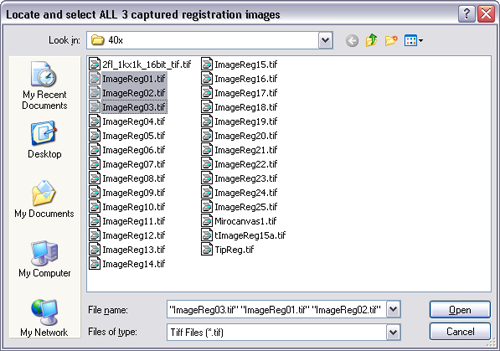
NOTE: If you are using an external camera controlled by a second computer, transfer of images between computers will be easier if the NanoScope computer is networked to the optical microscope computer.
- The 1st captured optical image will appear in the MIRO Canvas. Click on a unique portion of the probe, such as the tip or a corner and click Next:
(Hover over the image to view larger)
NOTE: You can zoom in on a feature of interest to help position the cursor more accurately.
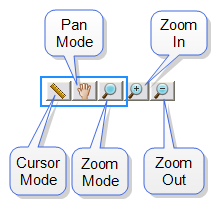
You can change the color of the cursor by right-clicking on the cursor, clicking Set Color > All to open the Color window. Select a color and click OK. Selecting Cursor rather than All will change the cursor color for just this one image.
(Hover over the image to view larger)
- Repeat this procedure with the other optical images selecting exactly the same feature on each of them.
(Hover over the image to view larger)
(Hover over the image to view larger)
The following window will open:
(Hover over the image to view larger)
- Click Finish to complete the registration. The Save & Set as Import Registration window will open.
- Click Add New and enter a file name for the registration file.
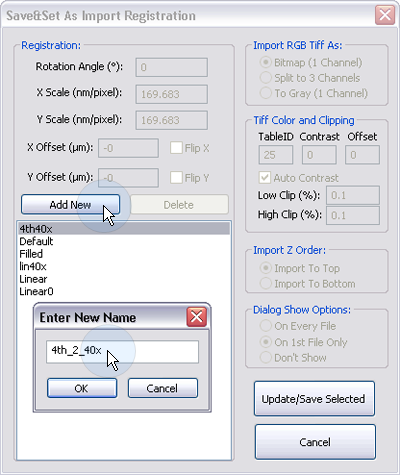
- Click OK. Both the Enter New Name and Save & Set As Import Registration windows will close.
NOTE: To switch to a different, previously saved, registration file, open the Save & Set as Import Registration window and select the desired registration file from the list then click Update/Save Selected.
NOTE: Under Dialog Show Options, select the Don't Show radio button. Otherwise, every time you capture an optical image this dialog will appear.
Previous Steps:
- Initiate Calibration
- Define the Area to Cover
| www.bruker.com
|
Bruker Corporation |
| www.brukerafmprobes.com
|
112 Robin Hill Rd. |
| nanoscaleworld.bruker-axs.com/nanoscaleworld/
|
Santa Barbara, CA 93117 |
| |
|
| |
Customer Support: (800) 873-9750 |
| |
Copyright 2010, 2011. All Rights Reserved. |
Open topic with navigation